Lode's Unreal - Q&A
Here you find some random questions with an answer. The answers were too small to make a complete tutorial about it, but that doesn't make them less interesting :)
What's the size of one unit in UnrealEd?
256 units = 487.68 cm = 16 feet.
The height of the player model = 83 units, so you can walk into any room that is 83 units or higher. You can't walk into a room that's 82 units high, but you still go into it with a translocator: the translocator works in any room that's 81 units or higher. If the room is 80 units or lower, and you try to teleport with the transloc, it'll make "brip" sound and you can't teleport.
The fatness of the player is 35 units: he can walk into any room that is 35 units or larger. However, the transloc only works until 37 units, so in a hallway that's 36 units thick, the player can walk but the transloc will not work.
It doesn't matter if the player ducks or not, his size is always the same.
What's the difference between MainScale and PostScale?
Both MainScale and PostScale can be found in the Brush
Properties of any brush and can be used to scale the brush without having to
use the Scale Tool.
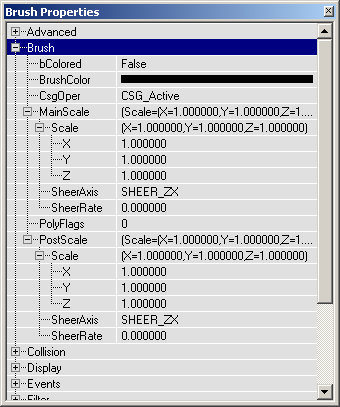
As long as you don't rotate the brush, MainScale and PostScale will do exactly the same: scale the brush along the X, Y or Z axis, for example if you set in Scale Z = 2, the brush will become twice as high (if you TransForm Parmanently a brush, all these settings will be 1 again, but the size of the brush will remain the same).
But once you rotated your brush, like on this picture:
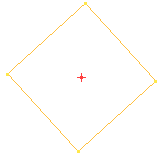
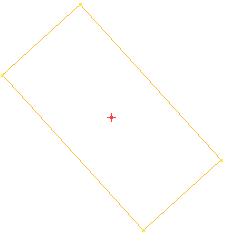
then there's a difference: in MainScale, the axes will have rotated together with the brush, for example the X and Y axis will have the same orientation as the sides of the brush. So if you enter in the X value of MainScale "2", the brush will be stretched along the rotated Y axis, and become a rectangle:
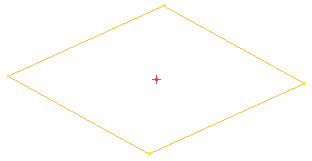
In the PostScale however, the axes are absolute: the UnrealEd CoordinateSystem. So if you set in the X of PostScale a value of "2", the brush will be stretched along the East-West direction of the Top view, like this:
Oh, and with SheerRate and SheerAxis you can skew the brush.
How do I import working masked textures?
I got this question so many times already :)
You need a Painting Program that can edit palettes, for example Paint Shop Pro or Photoshop. In there, make your texture, and reduce the color depth to 256 colors (in PSP it's Color --> Decrease Color Depth --> 256 Colors, in Photoshop it's in Image --> Mode --> Indexed Color). Now, go to the Palette (in PSP it's in Color --> Edit Palette, and in PhotoShop it's in Image --> Mode --> Color Table). In PSP make sure Sort order = Palette Order.
In the palette, the color with Index0 is the color that will become transparant in the editor. Here comes the difference between PSP and Photoshop:
In PSP, this color is the FIRST color (the upper left one) in the Color Table.
In PhotoShop, it's the LAST color (the lower right one) if you save your picture as a PCX file, and the FIRST color (the upper left one) if you will save it as a BMP file. It's best to save it as a PCX, so if you use PhotoShop use the lower right color.
For example, in PSP, the green would become the transparent color in this palette:
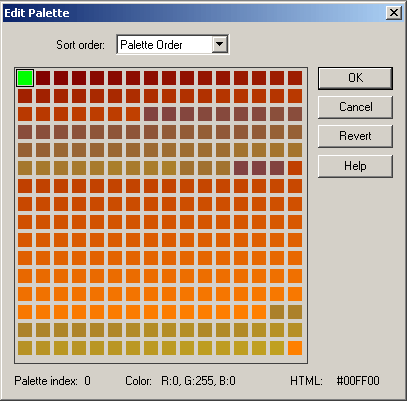
Make sure this color is unique in the palette (for example if it's green, make sure all other little squares in the Color Table are NOT that same green), and then give all the parts of you image that you want to become transparant that color.
Now save the image as a PCX file and import it into UnrealEd, then apply it to a surface, enable Masked in the Surface Properties, and this color should become transparant! When you import, you can also check Masked immediatly, so you don't have to set it in the Surface Properties.
.