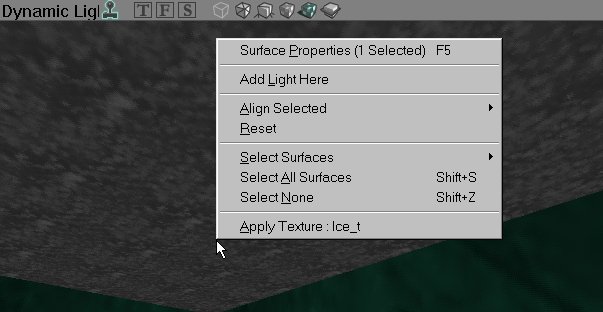
Right click on a wall, ceiling or floor...
There is just so much to tell about lights and they have so many properties, and I've never seen a tutorial that handles all of it, so I made one.
This is not a beginners nor an intermediate or advanced tutorial. This is a tutorial for everyone, even the most advanced mapper will learn something.
This tutorial is optimized for UEd2, but if you have UEd1, you can use this tutorial as well, because these two versions don't differ that much. And I've added remarks for UEd1 when there is a difference. You can of course apply the official UT 420 or higher patch to get UEd2. I recommend patch 436 or higher, because this one adds even more new features such as realtime preview of skyzones, editing the textures of a mover and a replace textures function.
If you want to print this tutorial: it's 71 pages here, but the number of pages might differ for you if your printer cuts pictures in half or not. You can use "multiple pages per sheet" to reduce the wasted paper and ink.
First you need a room to add the lights, so create one that's big enough
(you're going to add a lot of lights during this tutorial, so you'll need a lot
of space)
Once you have a room, right click somewhere in the 3D view, and in the menu that
appears choose Add Light Here. Now you see somewhere near the place you
clicked, a small torch picture appear. That's a light source!

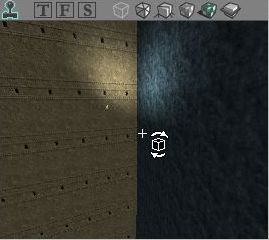
Right click on a wall, ceiling or floor...
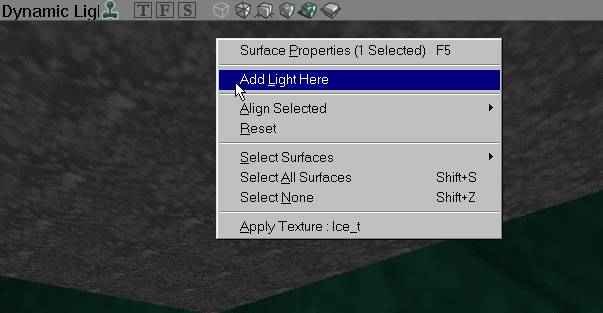
...choose Add Light Here...
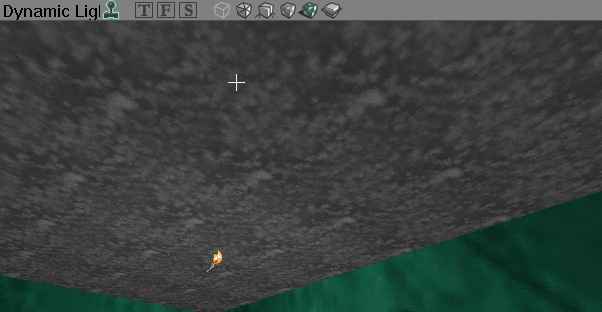
...and you get a lightsource.
If you have the 3D view in Dynamic Lighting mode, you should also see that
the walls around the light become brighter.
The 3D view has different modi, some of them are important when working with
lights. To select one, use the buttons on top of the 3D view or
search the menus of the 3Dview. The buttons that are green on the
screenshots are the ones you must press to activate that modus.
Textured: this will show all the walls of your map fullbright, and ignore all the lighting. This is not the way the walls will look in UT, in UT the lighting is always as in the Dynamic Light modus. There is an option NoLighting in UT, but that doesn't work when playing multiplayer, to prevent cheating. Only use this modus if you want to check the original texture of a wall that is too dark or colored by the lights.
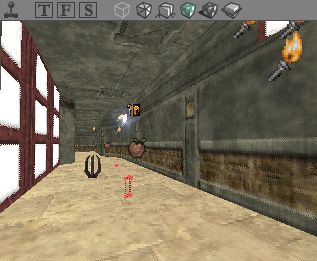
Light modus: Textured
DynamicLight: this will show your map with all lightingeffects. If you rebuild lights and you haven't added any lights yet, you'll see only black. This modus shows the lighting like it will look in UT, so always use this one when working with the lighting of your map.
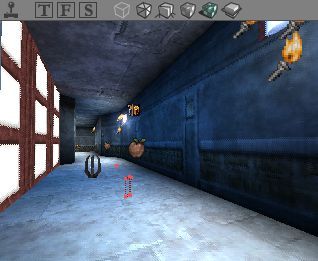
Light modus: DynamicLight
Realtime Preview: you can switch this on and of in all the views: click the button that looks like a little joystick on top of the view, or select a view and press p. Do not press the joystick on the main toolbar of the editor, that one starts UT to test the map. If a view is in realtimpreviewmode, it is always realtime updated, so if you change something in one view, you'll see that change also in the other view if it's in that modus. But this slows down the editor a bit. Another important thing about this modus, is that you can see animations like flikkering lights (see further in this tutorial) or animated textures. If Realtime Preview is off, you are not able to see how flikkering lights flikker.
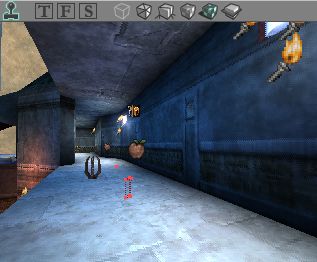
The joystickbutton activated: Realtime Preview
For this tutorial, please set the 3D view in DynamicLight modus. Activate RealtimePreview when busy with LightEffects, LightTypes and other animations.
When you placed the light, it probably isn't at the right place. To move it, first select it by clicking on its torch symbol in any of the views. It should become green. Now select a 2D or a 3D view and use the following key combinations to move it:
If you use these mousebutton combinations without CTRL, you move around the camera, that is yourself.
You cannot create a working map without rebuilding geometry, lights and
eventually paths.
If you don't rebuild geometry you might get squished if you enter the map in UT.
Every time you add a new polygon in the editor the geometry changes, so if you
want to play or test your map after you made changes to this, rebuild geometry
before saving. To rebuild geometry, you have to press this button in the
upper toolbar of UEd2.
![]()
If you have a small map, this takes less than a second, but if you have a large map, rebuilding can take up to several minutes. After you rebuilt geometry, you see that all the walls become bright, as if there were no lights. This is because rebuilding geometry deletes all the info on lighting in your map. To get the light effects back, you have to rebuild lighting.
This calculates the light of each lightsource on each wall and object and casts shadows caused by walls or objects. To do this, press this button in the upper toolbar of UEd2.
![]()
There is also a Build Options button. If you press this one, a window appears. In there, press the build button, and everything that you selected (geometry, BSP, lighting & paths) will become rebuilt automaticly.
![]()
And in version 436, an extra button is added to rebuild everything at the same time automaticly.
![]()
Instead of using the buttons, you can also open the Build menu and select one of the choices.
If you are using UnrealEd1, go to Options and choose Rebuild. In the window that appears, press the Rebuild Geometry button to rebuild geometry, and then use the Lighting tab to rebuild lights.
To make a colored light, select a light (a torch symbol), right click on it and in the menu that appears choose Light Properties, in the Light Properties window, expand LightColor and in there choose a color by changing one of the values.
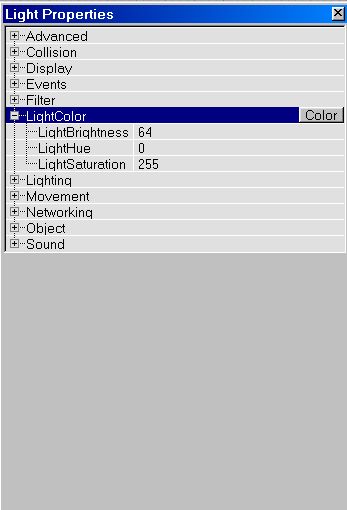
The LightColor tab.
The LightColor in UEd is based on the HSB model: you'll see three values: LightBrightness, LightHue and LightSaturation.
there also is an easier way to change the color of the light, but this is only available in UnrealEd2. If you click on the LightColor expansionfield, you'll see a button Color. Press it and you'll see the Windows Color Dialog Box. Just select your favourite color and press Ok.
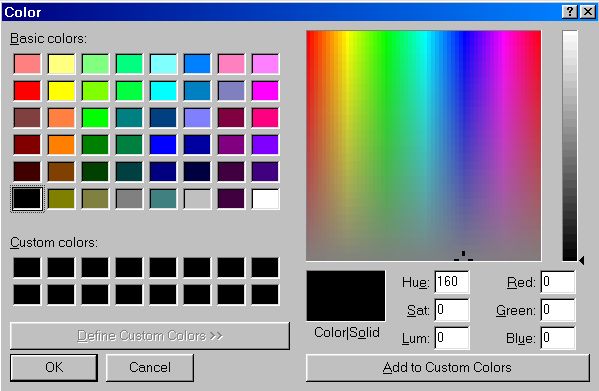
Window's Color Dialog Box
Another way to create light in your maps is using zonelight. ZoneLight will enlight to a whole zone without having to add a lightsource. There are two kinds of zones: the ones without a ZoneInfo in it, and the ones with a ZoneInfo in it.
To add light to the ones without ZoneInfo, open the menu View and in there choose Level Properties. If you have UnrealEd1, it's in the menu Options, or you can press F6. You now see the Level Properties window. In there, expand ZoneLight
If you have zones in your map with ZoneInfos (such as a normal ZoneInfo, SkyZoneInfo or WaterZone), select the ZoneInfo, right click on it and choose ZoneInfo Properties and in there, expand ZoneLight.
If you don't know anything about Zones and ZoneInfo, you probably don't have any in your map. In that case, Level Properties will do. If you want to understand more about zones, water and skyboxes, read a tutorial about it, for example at http://www.planetunreal.com/unrealed.
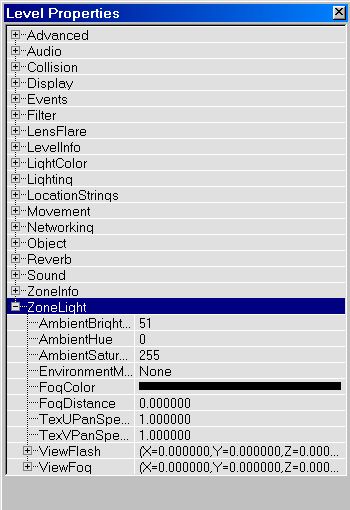
The ZoneLight tab
To create the ZoneLight, enter a value in AmbientBrightness. The higher the value, the brighter the ZoneLight will be. Its default value of 0 means there is no ZoneLight. For example this is a map with all the lights removed, and AmbientBrightness set to 0, so it's completely black. On the second screenshot, AmbientBrightness in the properties of the ZoneInfo was set to 255, so the map is bright.
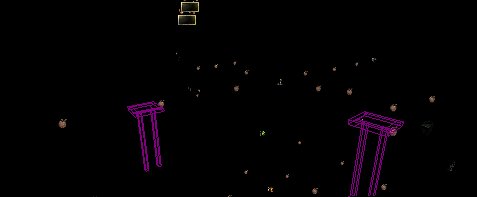
AmbientBrightness set to 0
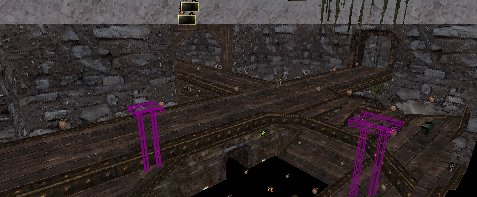
AmbientBrightness set to 255
As you can see the it's very boring light, so never use ZoneLight without normal lights. In fact, never make the AmbientBrightness higher than around 32, it's much better to use nothing but normal lights, and use the ZoneLight only to reduce the shadows a bit.
To get colored ZoneLight, use AmbientHue and AmbientSaturation. The color of the ZoneLight is based on the same HSB model as the normal lights.
If you have a SkyBox, never forget to add light in the SkyZoneInfo (or with normal lights) or you'll have a black sky.
There are some more settings in the ZoneLight properties of a ZoneInfo. They don't do anything about the lighting of a map, but some of them are useful.
Select a light (a torch symbol), and right click on it. In the menu that appears, choose Light Properties. In the Light Properties window, expand Lighting
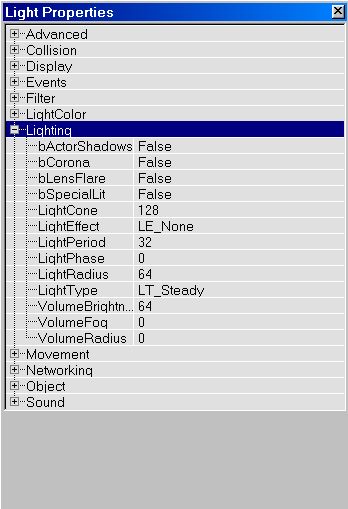
The Lighting properties.
You should see the value LightRadius there. That value determinates how far the light will shine. When adding a corona to a light, it will also determinate till which distance the corona is visible.
Click on the LightRadius field and enter a number. Make sure the
RealTimePreview of the 3D view is on so you can immediatly see the effect of the
value you entered.
If you set it to 0, there will be no light, and the higher you set the number,
the further the light will shine. If you think the max value of 255 isn't
far enough, there are several things you can do:
There is a useful option in the editor that you can use to see the radius of the light in the 2Dviews: rightclick on top of one of the 2D views, in the menu that appears choose Actors, and there check Radii View. As long as this option is enabled, you'll see a red circle appear around the light(s) you have selected. You only see it if you have selected the light: to select one leftclick on the torch symbol. These red circles are usually very large (the one on the screenshot below is for a Light Radius of 13). Because the lights shine the further the less bright, the red circle seems larger than the lightradius looks in real. Sometimes the circle is so large that it doesn't appear. That means that it is bigger than the 2D view. You have to zoom out to see it.
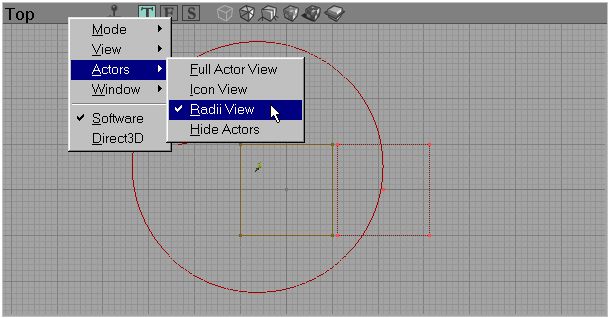
The red circle shows the radius of the light
The LightType determines if you light will be always on, always off or an animated combination of bright and dark by flickering, pulsing, blinking and so on. It can even loop through different colors if you use TexturePaletteLoop (this is explained in the section TexturePaletteLoop of this tutorial). Go to the Light Properties (right click on the light and select Light Properties in the menu that appears), expand Lighting and click on LightType. You should now see all the LightTypes.
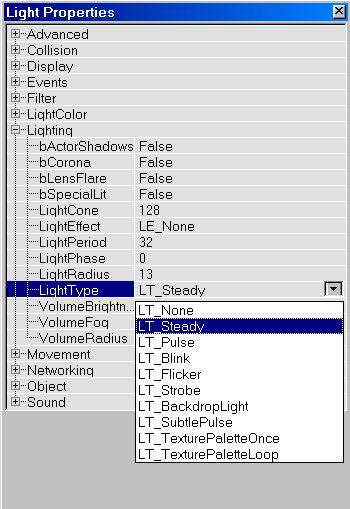
The list of all LightTypes
I'll give a detailed description of each LightType, but first make sure the 3D View is on RealTimePreview
LightEffects are animations of the light that not only change the brightness of it, but also the direction and the shape of the shine on the walls. But if you use too many LightEffects, this could really slow down the processor, so to keep a good performance in your maps, don't overdo this.
Go to the LightProperties and expand Lighting. There click on LightEffect. You get a list of all the LightEffects.
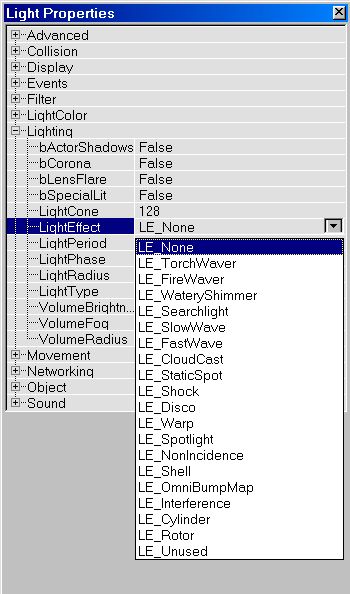
The list of all light effects.
I'll give a detailed description of each LightEffect and give screenshots of each one, but first make sure the 3Dview is on RealTimePreview.
LE_None: This just a normal light. In contradiction to LT_None, LE_None
does not mean that the light is Off.
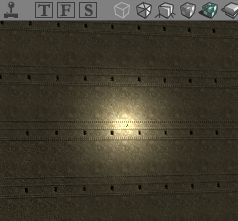
LE_TorchWaver: Makes the light move like a torch.
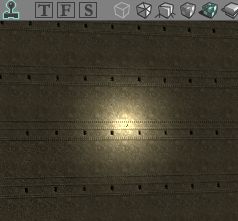
LE_FireWaver: This does the same as LE_TorchWaver, but heavyer. The
light will move like fire. Handy to use when you create a fire or a torch.
(On the screenshot below, it isn't good to see, because in reality it moves)
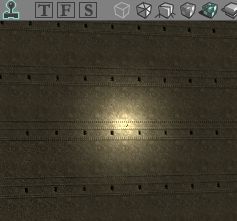
LE_WateryShimmer: The lighting will move like water. Use it when you
create a pool inside a building, to shine on the walls of the building. Or use
it underwater in any pool.
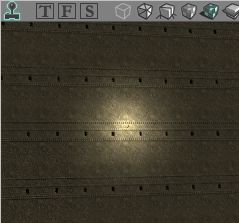
LE_Searchlight: The lightbeam will rotate, like a searchlight. Think
about Alcatraz. If LightPeriod is 0, the SearchLight will not rotate.
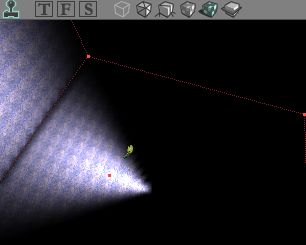
LE_SlowWave: Some kind of animated wave-effect.
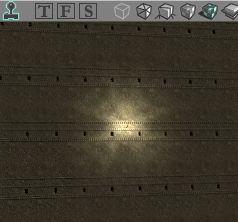
LE_FastWave: Same as LE_SlowWave, but faster.
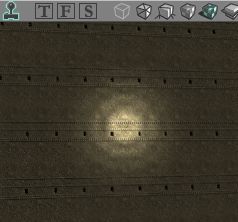
LE_CloudCast: Looks to be just steady. This is probably an old
remainder of the pre-release version of Unreal.
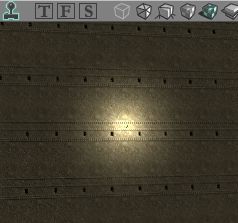
LE_StaticSpot: The light will beam in one direction. Look further
in this tutorial how to change the direction and the size of the beam.
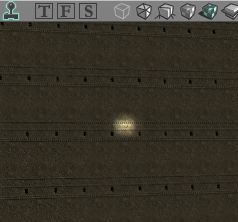
LE_Shock: Another animation for the light.
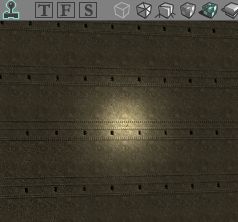
LE_Disco: A nice disco-effect.
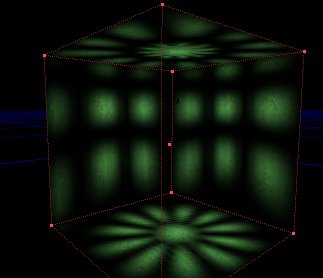
LE_Warp: Looks to be just steady. This is probably an old remainder of
the pre-release version of Unreal.
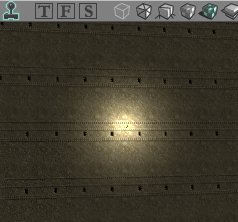
LE_SpotLight: The same as LE_StaticSpot. Look further in this tutorial
how to change the direction and the size of the beam.
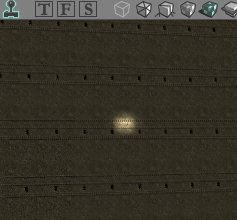
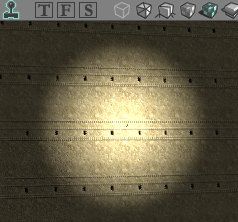
LE_NonIncidence: like LE_None, but the light will have almost no fading-away
at the edges. This makes it look like the radius is larger. Compare
this screenshot to the one of LE_None. The LightRadius is the same for
both lights.
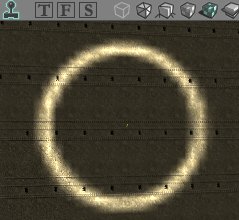
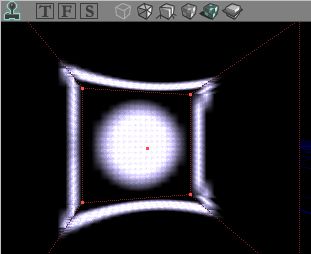
LE_Shell: If you use this correct (close enough to wall), the light will look
like a ring on the wall. In larger rooms, it might look like the blue
screenshot.
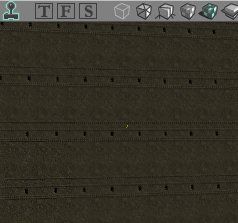
LE_OmniBumpMap: Can be used to create blacklights (see further). This
is not what the name suggests, so this is probably an old remainder of the
pre-release version of Unreal.
LE_Interference: Another animation for the light.
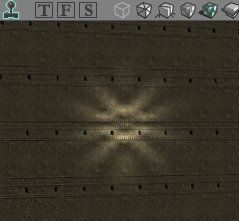
LE_Cylinder: I use this if I need a really large LightRadius. The
lightradius is calculated as a cylinder instead of a sphere with soft edges.
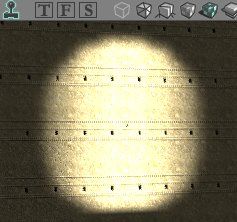
LE_Rotor: The light looks as on the screenshot, and rotates.
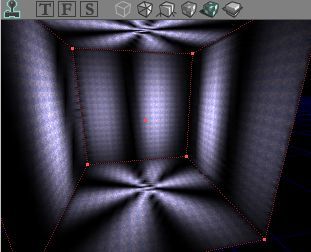
LE_Unused: Exactly the same as LE_None. This is probably an old
remainder of the pre-release version of Unreal.
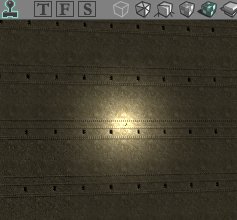
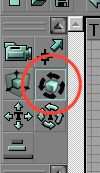
To change the direction of the beam of a SpotLight or a StaticSpot, use the
Rotation Tool
If you have Unrealed1, use this button:
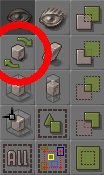
Now, select the light. Hold down CTRL and the right mousebutton to rotate it from left and right, and use left mouse button to rotate it up and down.
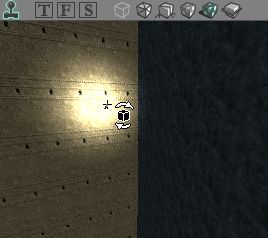
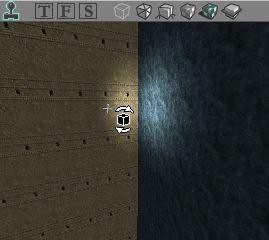
You can make the spotlight to have an arrow in the 2D views. To do this open Advanced in its properties and set bDirectional to True. The arrow indicates the direction of the light. This has no effect on the look of the map in UT.
You can make lights that don't illuminate the textures, but only actors and objects. This way, they approach the blacklights used in dancings. If you make a dark room, with no normal lights in it, only a BlackLight, and then play the map, you will see nothing, only your opponent, the weapon you are holding in your hand and objects such as trees, crates and tables that you placed in there.
To make a BlackLight, add a light and set its LightEffect to LE_OmniBumpMap. That's it! What you created now is not really spectacular. To make the BlackLight more spectacular, you can give it another color and LightEffect, for example set LightType to LT_Strobe, and make it violet.
You can use this effect to make a dancing, but you can also use it in a more subtle way: in a normally illuminated room, you can add a few of these blacklights to make players and objects brighter than the rest of the room. Or you can use it for special maps in which you can only see opponents and no walls.
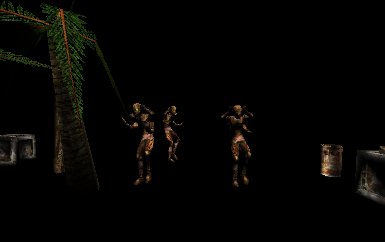
The actors are illuminated by the blacklight, but the walls are
not.
Again, open Light Properties of the light and expand Lighting. Notice the following properties: bActorShadows, LightCone, LightPeriod & LightPhase.

bActorShadows: This was supposed to let the light cast realistic shadows of actors, but it doesn't work.
bLensFlare: This doesn't do anything. This is probably an old remainder of the pre-release version of Unreal. You could enter about 15 different coronatextures and make the effect of LensFlares in a camera. However, this is left away in the final version of Unreal.
LightCone: If the LightEffect is SpotLight or StaticSpot, use this to change size of the lightbeam.
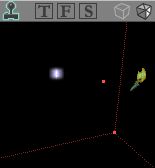
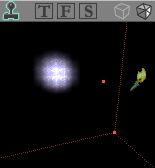
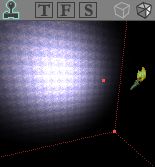
LightPeriod: Use this to change the speed of the light-animations LT_Pulse, LT_SubtlePulse and LE_Searchlight. This does not work for the LightEffects and LightTypes, not even the LT_Strobe. The lower the number, the faster the animation will run. For LE_SearchLight, it moves at its fastest when LightPeriod is 1. When it's 0, LE_SearchLight will not move at all.
LightPhase: use this to set the phase of the animation-cycle the light will start with. For examle: if you have 2 Pulsing (LT_Pulse) lights, and want the first one to fade in while the second one fades out you'll have to use this slider. Add two lights close to a wall. Set the lighttype of both of them to LT_Pulse. Now select one of them and set its LightPhase to 128. An animation-cycle takes 255 steps, so 128 is exactly the middle of the animation. This means that while light one is in the start of the animation (= fading out), the second one is already in the middle of the animation (= fading in).
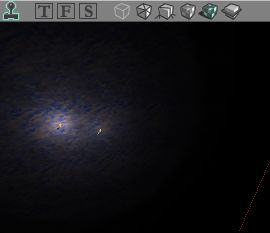
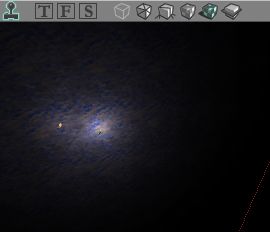
If you want for example a pulsing light that does not becomes red, black, red, black but red, green, red, green, you have to use the trick explained in this section.
To make a pulsing light that fades from red to green, first add two lights. Do not yet place them on the same place, otherwise they're standing in each others way so it's difficult to select each one of them. Select the first light and open its Light Properties, and set its LightType to LT_Pulse. Now expand LightColor and set its color to green (use a low saturation). After you've done this, select the second light and set its LightType to LT_Pulse. Set its color to red (again a low saturation). Make sure both lights have the same LightPeriod. Set the LightPhase of one of the lights to 128, and the other light's to 0. Now place both lights on exactly on the same place, so it will look like it's one light that does a TwoColorPulse.
To make a TwoColorStrobe, do the same but with LT_Probe.
Another way to make this kind of effects, is using TexturePaletteLoop. You can read more about this further in the tutorial.
A corona is a 2D picture placed on the lightsource. It is not like a 2D sprite, because 2D sprites become smaller on your screen if you walk further away from them. The corona of a light is alway as large on your screen.
To give the light a corona, open its Light Properties and expand Lighting. In there set bCorona to True. Now, open the Texture Browser. To do this, open the menu View and there choose Texture Browser. If you have UEd1, the Texture Browser should be open already, if not, just search in all the menus or read a beginners tutorial about UEd1. Also, in version 436 of UEd2, they have forgotten to add the Texture Browser in the menu, but you can use the button in the upper toolbar that looks like this:
![]()
In the TextureBrowser, open the menu File and there choose Open. In UEd1, just click on the Open button. Go to the Textures folder in your Unreal Tournament or Unreal folder, and open GenFX.utx. The package GenFX has multiple groups in it, one of them is called LensFlar. See screenshot below to see which dropdownmenu to use to open LensFlar: I painted a red circle around it. If you have UEd1, probably all folders will be visible, so ignore this. Now you should see a lot of lensflare pictures. Choose one and select it.
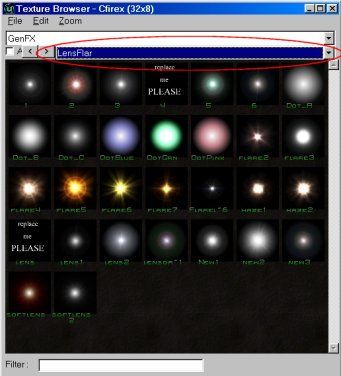
The LensFlares of GenFX
GenFX is the main package for coronas, palettes, etc..., but there are more corona textures in other packages and groups. For example City.utx has some.
Now go back to the Light Properties and expand Display.
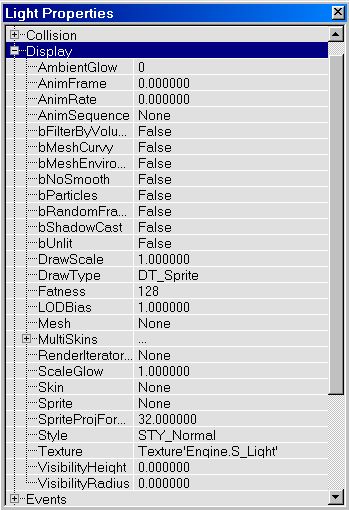
The Display tab
Click on Skin. A button Use appears. Click that button and the name of the texture you selected should appear in the textfield. Before you can see the corona in UEd, you have to rebuild geometry. After that, also rebuild lighting. Now you'll see the corona in the 3D view. If you don't see it, make sure the camera is close enough to the light if it has a small LightRadius and that the camera is not inside a wall. If you still don't see it, it might be that your software or hardware modus doesn't has the corona option enabled. go to the Fog-section of this tutorial and read the first part of it, but instead of tutning on the VolumetricLighting option, turn on the Corona option.
If you think the corona is too small or too large (it will probably be too large), use Display in the Display expansion of the Light Properties. Try entering different values in it. 0.2 is most of the times perfect.
The LightRadius value does not only determine how far the light will shine, but also from which distance you start to be able to see the corona.
If you want to make a light with a very small radius but a corona that's visible from very far, just use two lights: one without corona that gives light in small radius, and one with corona, LightBrightness set to 0 and a large LightRadius. Then place these two lights on the exact same position.
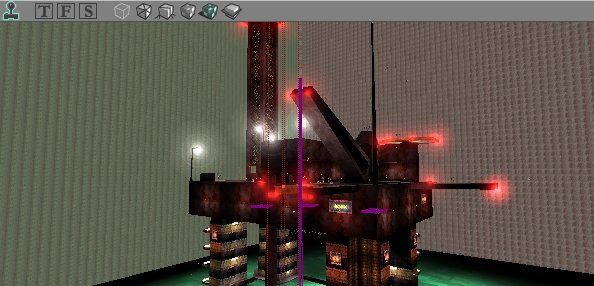
Coronas in DOM-MetalDream
To make an animated corona, use an animated texture as skin. But there is a problem: there are no animated corona textures avaible in the standard texture packages. You have to make one yourself.
To make a strobing corona, select a standard coronatexture and look at its size (its size should appear on top of the Texture Browser window). Most of the times they are 128*128 or 64*64. With any painting program, make a completely black picture that has the same size as the corona. Save it as a 256 color PCX-file. Now go back to the texturebrowser, and select the coronapicture. open the menu File of the texturebrowser and choose Export. In UEd1, just click on the Export button. Save the flare as a PCX-File. After that, click Import. Open that same PCX-File you just saved, and in the Import Texture window, type the following things:
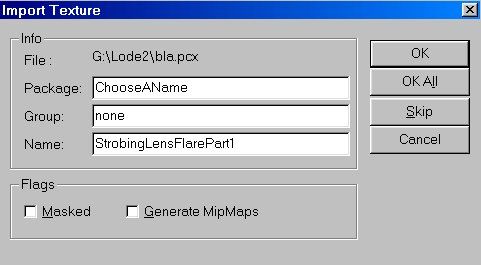
The Import Texture window
Make sure that you type a packagename that DOES NOT already exist, or you'll overwrite an existing package and destroy your UT!
Press OK. Now again choose Import, but this time open the black texture you created. In the Import Texture window, type the same Package as before. Use a different Name for the texture. (for example StrobingLensFlarePart2)
After you did this, select the package you created and in there you should see the two textures: The lensflare and the black one. Select the LensFlare texture and in the menu Edit of the Texture Browser, choose Properties. Or rightclick on the lensflaretexture and choose properties. In UEd1 select the texture and press the Edit button on the bottom of the Texture Browser. In the Texture Properties window that appears, expand Animation. Go back to the Texture Browser and select the black texture. Now go back to the Texture Properties, click on AnimNext and click the Use button. The name of the black texture appears. You'll also see that the example will strobe. Change the MaxFrameRate value to change the strobing speed. The higher the value, the faster it strobes. Setting it higher than 16 doesn't appear to work. The lower the value, the slower it strobes.
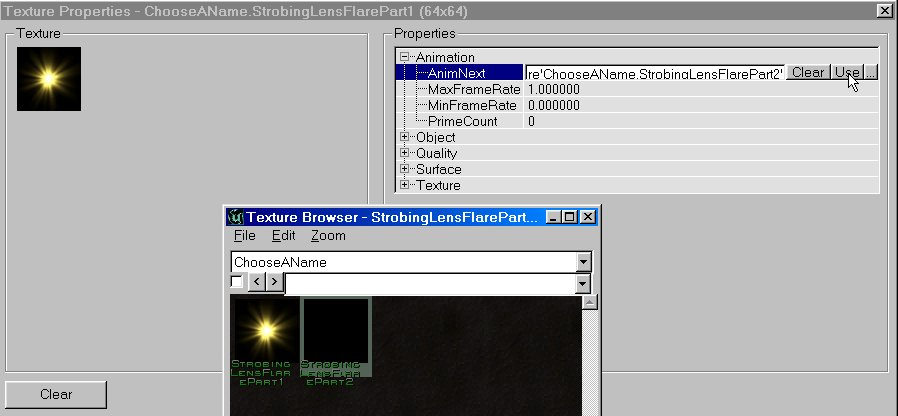
The Texture Properties window, and the Texture Browser.
Before you can use this in your maps, you'll have to save your ChooseAName Package. Open the menu File of your TextureBrowser and choose save make sure you DO NOT overwrite an existing package, or you'll ruin your Unreal Tournament. Save it as the same name you already gave it, in my example ChooseAName.utx. If you called the package MyLevel you don't have to save it, it will be saved automaticly in the *.utx file of your map then. However, this also means you can't use the package for other maps.
Now select any light and give it your strobing texture as skin. The animation will only be visible in Unreal Tournament, not in the editor.
Why using this? Because the coronas in the Unreal engine have a big problem: when you set the LightType to LT_Strobe, LT_Pulse, LT_Flicker or whatever, the light will strobe but the corona will not, which is not very realistic. But the animated corona you just created strobes. Of course, your timing needs to be perfect...
To make a rotating corona, export the standard corona texture you want and open it in any painting program. In there, rotate the corona a little bit and save texture as a new PCX-file, rotate again, save again, etc... untill you're rotated back to the original position. Rotate at for example 30 degrees to have 12 different animation frames. Import the textures in a new texture package. In the Texture Propoties, first select the first texture and set its AnimNext to the second one, set the AnimNext of the second one to the third one, ... , and set the AnimNext of the last one back to the first one. Play with the MaxFrameRate and MinFrameRate to try out different effects. And of course save your texture package and make sure you don't overwrite an existing one!
You can also create coronas that change color, grow and shrink, or anything else.
In old 3D games, such as Wolfenstein 3D, Doom and Duke Nukem 3D, the objects were 2D pictures. No matter from which angle you looked at them, they always looked the same. The soldiers in Wolfenstein had 8 pictures, so you could see them from 8 different angles, but that still isn't 3D. What does this have to do with lighting? You can use the lights to create the effect of sprites in Unreal. You can also do this with other object, but lights are one of the few that don't have a mesh, so they are easier to use for this purpose. How? Make a light and set its LightBrightness or LightRadius to 0 (you don't have to do that, if you want the object to give light). Open its LightProperties, and expand Advanced. In there, set bHidden to False. This means that the torch symbol will now also be visible in Unreal Tournament, and not in the editor only. The only thing you've got to do now is to change the torch picture in another picture. Open the texturebrowser and select anything you like. If you import a picture, make sure that you set it to be masked if you don't want a black square around it. Masked will make the first color in the palette to become transparent, in most cases this is the black. Go back to the Light Properties and expand Display. Play with the following settings:
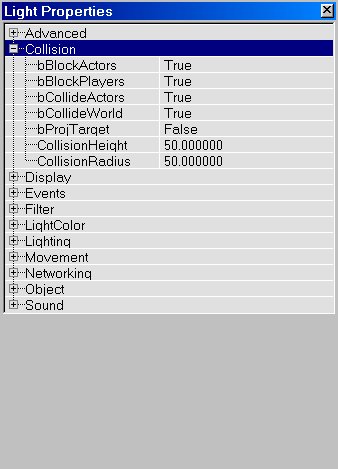
The Collision tab
You can of course also use this 2D-objects effect for other things, for example if you use the texture of an eyeball, the eye will always look in your direction.
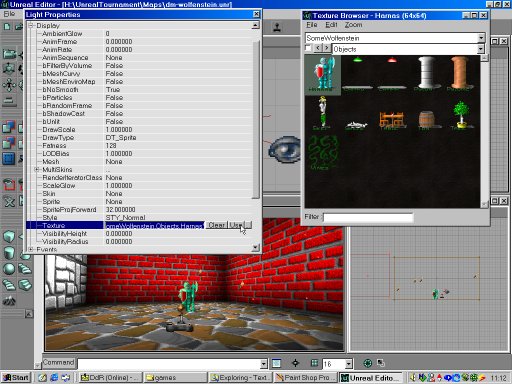
Some 2D Wolfenstein Sprites
Fog isn't called fog in the Unreal Engine, but Volumetric Lighting. Creating fog is quite difficult, and it also slows down the computer. Fog in Unreal isn't like fog in for example Delta Force II, and making a foggy outdoor map is almost impossible. Most Unreal Tournament players don't even have the Volumetric Lighting propertie set to True, so they won't be able to see the fog. Probably even you don't have it enabled. To enable it, or to check if it is enabled, you must open the Advanced Options Window. This window is somewhat hidden, but there are several ways to open it:
In the Advanced Options window, expand Rendering and in there expand Software rendering. That's the modus that UnrealEd uses in most cases. If it uses Direct3D, expand that one. In there, set VolumetricLighting to True. If your map already has fog, you can see it in your editor now. Notice that there are lots of other options. Make sure Coronas and ShinySurfaces are set to True and that FastTranslucenty is False because that's ugly and is only for very slow computers. ShinySurfaces are mirrors.
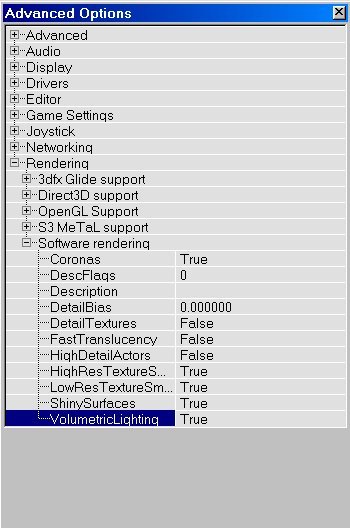
The Software rendering properties
To be able see fog in Unreal or Unreal Tournament, expand the 3D modus that your Unreal Tournament uses, in this example Direct3D, and there set VolumetricLighting to True.
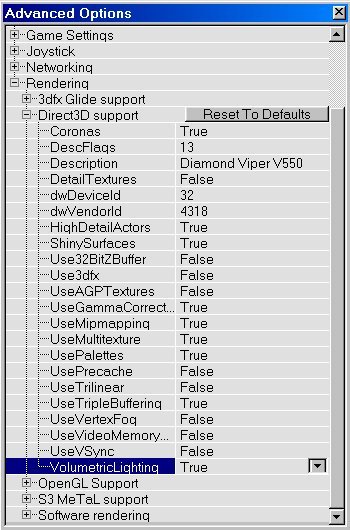
Direct3D properties
To create fog you need a lightsource, placed in a FogZone.
If you want to place the light in a zone without ZoneInfo, go to Level Properties. If you don't know how, read the section ZoneLight of this tutorial. In the Level Properties Window, expand ZoneInfo and in there set bFogZone to True. If you want the fog in another zone, right click on the ZoneInfo actor and there xpand ZoneInfo and in there set bFogZone to True. Now select the light that will become fog, and open its Light Properties. Expand Lighting. There are three values important for Volumetric Lighting.
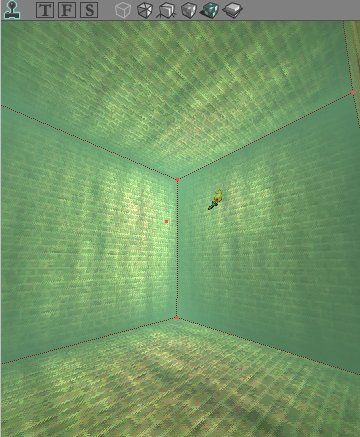
A room with green fog
You can also use fog to create coronas: just give it a really small radius.
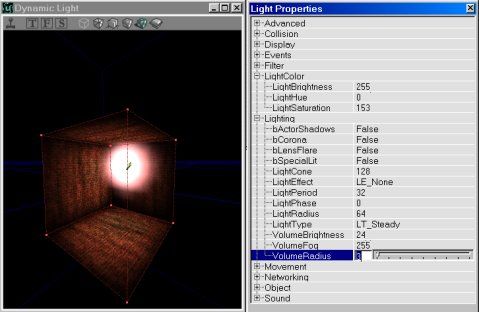
A corona created with Volumertic Lighting
As you can have ZoneLight, you can also have ZoneFog. You can create this effect by using Screen Flashes. To enable it, open the ZoneInfo or LevelInfo properties and expand ZoneLight.

The ZoneLight tab
Expand ViewFog, and you'll see 3 values: X, Y and Z. X stands for Red, Y stands for Green and Z stands for Blue. Enter values between 0 and 1 in it. ViewFog creates a translucent layer of the RGBcolor you entered on your screen, so it appears like fog. For example if you enter X=1, Y=0 and Z=0, you'll have really red fog in that zone. To get white or grey fog, give X, Y and Z the same value, for example 0.5, 0.5, 0.5
ViewFlash needs values between 0 and -1. It reduces the ViewFog a bit.
You can't see this fog in the editor, and you can only see it in UT if you have the screenflashes option enabled. Go to the Advanced Options of UT (see the Fog section for that) and expand Display. There set ScreenFlashes to True. These Screen Flashes are also used to turn the screen red when you're hit by someone, and for example WaterZones have green ZoneFog.
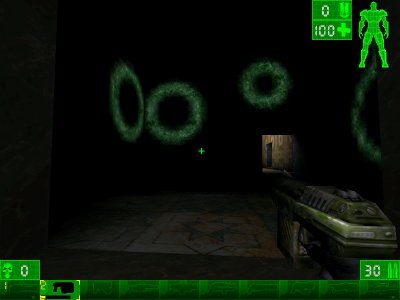
No ZoneFog
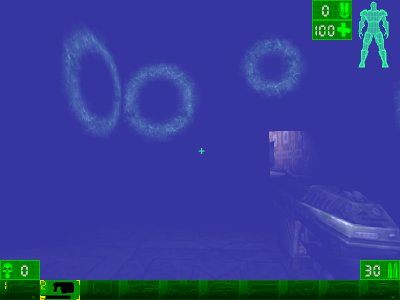
Blue ZoneFog
When you place any light or use ZoneLighting, the walls are affected by these lightsources. But it is possible to make the walls ignore the lighting and just be completely bright, even if they are in a dark room. Create a normal cuberoom, add some very dark lights in it and make sure ZoneLighting is set to 0. Now rebuild lighting. You'll see nothing but black now. Now select one of the walls. Blue dots should appear on it. Right click on it. In the menu that appears, choose Surface Properties. (In UEd1 doubleclick on the surface does the same). In the Surface Properties open the Flags-tab.
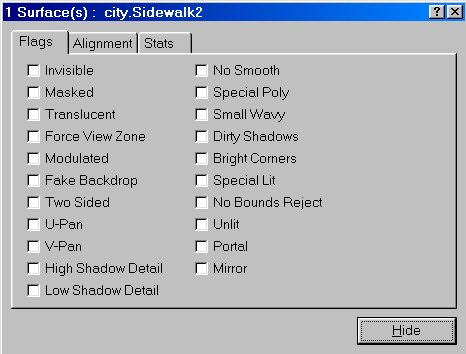
The Surface Properties window
There activate Unlit and rebuild lighting. Notice how all the walls of the room are dark, exept the one you set to Unlit. Just for fun, add a light in the room. The dark walls will be affected by the light, but the unlit will remain unaffected. They also ignore ZoneLighting.
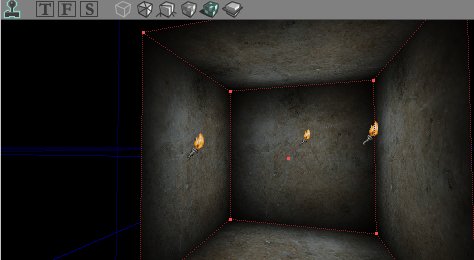
None of the walls are unlit
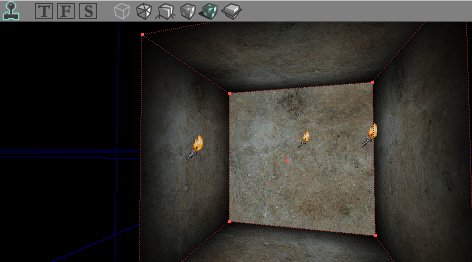
A unlit wall
Use this option for example for surfaces that are giving light, such as lava or computer screens. Also add some lights around it to make the other walls appear to be enlighted by the lava or the screen.
The surface propertie Force View Zone does the same as unlit.
To make objects unlit, open Display in their properties and set bUnlit to True. Now, the brightness of the object depends on its scaleglow setting only.
Again make a normal cuberoom, and add two lights in it: a red one and a green one. Give them a high LightBrightness and LightRadius, and a low LightSaturation. Rebuild geometry and lighting.
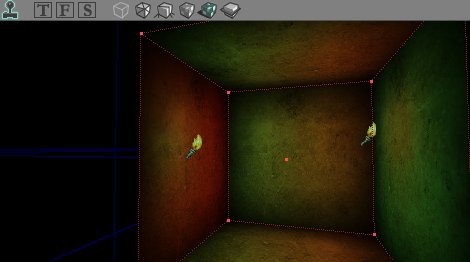
No Special Lit
Select one of the walls and open its Surface Properties, and activate Special Lit (make sure Unlit is Off). Rebuild again. The Special Lit wall is just black, while the others are still illuminated. That's because walls that are set to Special Lit, don't get light from the lights you added. Note: Special Lit walls DO get light from the ZoneLight, so if it doesn't look black check if there is ZoneLight.
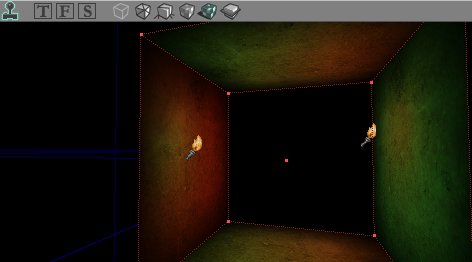
The special lit wall is black
They can only be enlighted by lights that are set to special lit as well, or by ZoneLight. Open the Light Properties of the red light and expand Lighting. Now set Special Lit to True and rebuild lighting. The normal walls are green and the Special Lit wall is red.
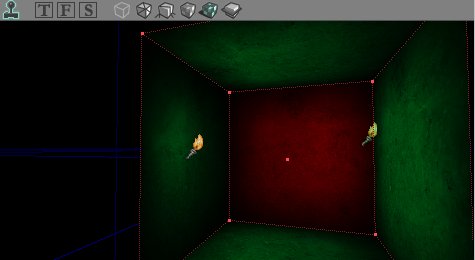
The Special Lit wall gets red light from the Special Lit light
You can use the Special Lit option for two things: to make black walls (if you don't add any Special Lit lights, and there is no ZoneLight), and to make lights that may shine on one thing but not on another. For example if you want to make a computer screen that pulses if you don't want the environment to flicker, you'll have to add a light in front of that screen and set the LightType to LT_Pulse and set the screen surface and the light to Special Lit.
There is another surface propertie, called Bright corners. If this is not activated, the corners of the walls will be darker than the center of it. If you activate it, the sides of the wall will be as bright as the center. Use this for outside landscapes or if you don't want darker corners in a room. You can see the difference on these screenshots:
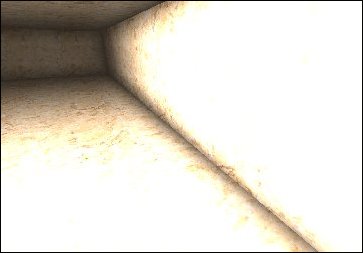
Dark corners
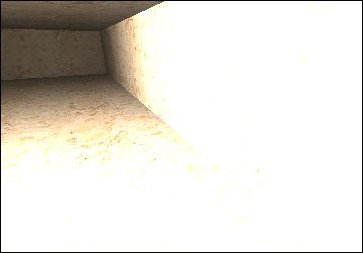
Bright corners
The size of the corners is determinated by the scaling of the texture you used (to scale the texture of a surface, use Scaling in the Alignment tab of the Surface Properties). If you use a really large scaling for a texture, its corners will be so big that the whole surface will be black no matter how many lights you place next to it. In a 256*256*256 room with a normal light in it, a texture with a scaling value of 4 will be hardly illuminated! Also, if you have really small surfaces with a scaling of 1, the corners will still be larger than the surface. Of course, if you set Bright corners to True this problem will not occur.
An example of such a problem, that really annoyed me, is when you subtract a tubelight in the ceiling. As long as it has dark corners, the whole tubelight will be black. Only after you enabled Bright corners for these surfaces you will be able to see them.
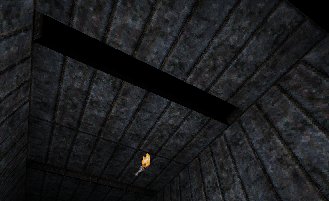
Dark corners (too dark)
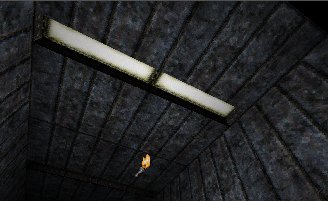
Bright corners
The quality of the lightmaps on a surface depends on the Shadow detail you give it. Open the Surface Properties of the walls, floor and ceiling of a room and try these things. Always rebuild lighting after altering a propertie, to see the result:
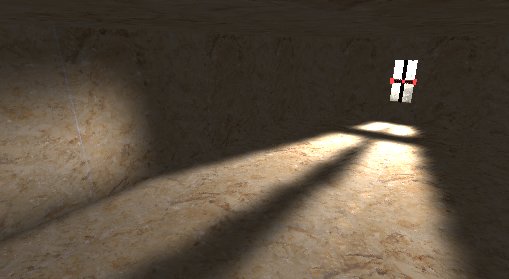
Set the surfaces to high shadow detail to get realistic light
effects
This is a cool feature of the Unreal engine, that not many people know: you can make the lights loop through different colors. To do this, open a light's Light Properties and set its LightType to LT_TexturePaletteLoop. Now go to the texture browser and open the package GenFX.utx or Palettes.utx. In these packages are good palettetextures.
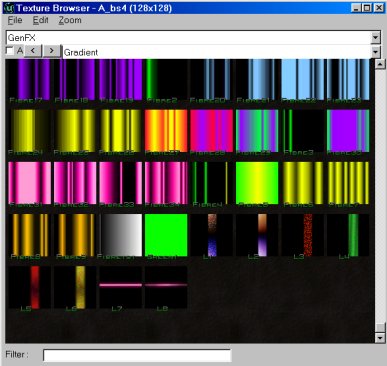
The gradients of GenFX
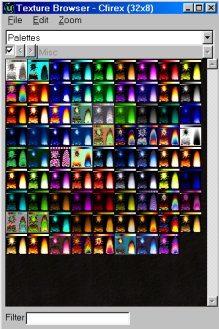
The palettes
Select one of the palettetextures, and then in the Light Properties, expand Display and click on Skin (the same thing you use to create a corona). Press the Use button.
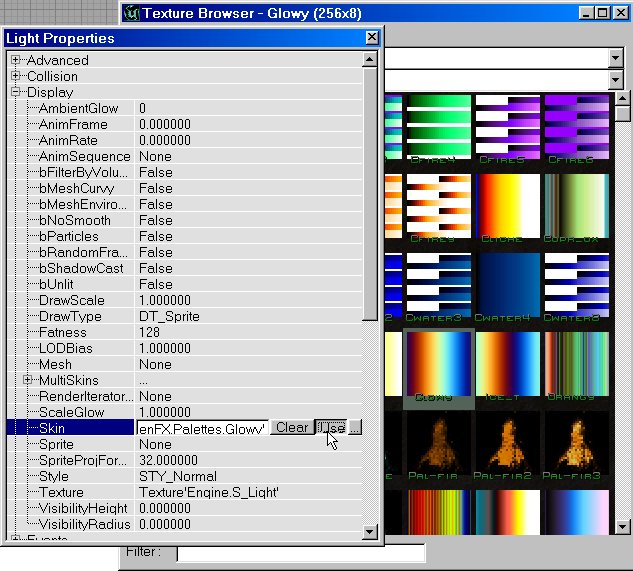
Use a gradient or palette as Skin for the light
The light will loop only through the colors of the palette (in their order) from the texture you used. It ignores the texture itself. If you want to make a light that fades from red to green to blue to yellow back to red etc... and don't find a texture for this, you'll have to use a program like Paint Shop Pro or PhotoShop and make a new 256 color texture. To edit the palette in PSP7, open the menu Colors and there choose Edit Palette.... However, editing the palette is a long and boring job. There exist specialized programs to do this, but I don't know any names at this moment.
Now set the 3D view to RealTimePreview and DynamicLight modus and view the light changing color. If it isn't clear enough, try some other textures. To change the speed of the effect, use LightPeriod under Lighting. You can also use LightPhase and other settings to get the light exactly how you want it. However, the LightHue and LightSaturation settings are ignored.
You can use TexturePaletteLoop for example to create a fire: use a palettetexture with yellow, orange and red colors in it.
If you set bCorona to True, the palettetexture will also be used as coronatexture, because the same skin is used for corona and palette. This is ugly of course. If you want the TexturePaletteLight to have a corona, add a second light and set its Brightnes to 0 (not its LightRadius), give it a corona and place it on the same place as the TexturealetteLight.
If you have a discolight, with LE_Disco, it is very cool to combine it with LT_TexturePaletteLoop. As skin, use Candy from the Palette.utx package, because that is a real colorful one.
TexturePaletteOnce makes the light go through the palette only once. It's used for the weapons, explosions, teleporters, spawnpoints, etc...: these cast a colored lighting effect that stays there only for a short time.
To get TexturePaletteOnce to work, there are three obstacles that you need to overcome:
The last obstacle means you don't have to place your light in the level, but instead you need to place something that spawns the light. You can use a ThingFactory + SpawnPoint, but here I'll use a very simple spawnscript instead. Then you need to make a new Actor Class: that will be the light that has to be spawned: in this new Actor Class you have to set the Default Properties (it's in there that you have to set LightType to LT_TexturePaletteOnce etc...), because it's impossible to tell a ThingFactory or the spawnscript I use here to spawn an existing actor with modified (= non-default) properties. However, when it spawns the new class you make, the default properties of this class will be used and that is exactly what you want.
Let's start with the spawnscript. If you want to use the ThingFactory instead, go to here. The reason I use this Spawnscript is because it's so much more simple than the ThingFactory: all it does is spawning the actor you want at its location, every time when it's triggered. The other reason is because the lights with TexturePaletteOnce were only called by scripts anyway (for example by the explosioneffects etc...). In the Actor Class Browser select KeyPoint, then open the menu "Class" --> New..., and in the window that appears make sure after the word "Parent" the word "KeyPoint" appears (if it doesn't, press cancel and select KeyPoint in the Actor Class Browser before making the new class. Of course, if you want it to expand another class, just select that class instead, but then your script will differ a bit from the one I enter below). Type as Package "MyLevel" (because it's ridicilous to bother the players of your map to put a new *.u file in theis system folder for such a small script), and type as Name "SpawnThing". Now in the Actor Class Browser, double click on the newly created SpawnThing, and the script window should appear. Simple enter the following script in it:
//=============================================================================
// SpawnThing.
//=============================================================================
class SpawnThing expands KeyPoint;
var() class<actor> SpawnedActor;
function trigger(actor Other, pawn EventInstigator)
{
Spawn(SpawnedActor);
}
Then in the script window open the menu Tools and press Compile Changed (do NOT
press Compile All, unless you want to wait for a year).
Ok, now you have the SpawnThing, or you have a ThingFactory, now you need to make the new light class. In the Actor Class Browser select Light, then open the menu "Class" --> New..., and in the window that appears make sure after the word "Parent" the word "Light" appears. Type as Package "MyLevel", and type as Name "TPOnceLight" (or whatever other name you like to give it) and press Ok. Now select this newly created class in the Actor Class Browser, right click on it and open the Default Properties of the TPOnceLight (so DO NOT add this TPOnceLight in the level, just open its Default Properties. In the Default Properties expand Advanced, set bNoDelete to False and bStatic to False. Then enter a LifeSpan: this is the time the light will live after it's spawned, and also the time it takes to loop through the palette. Once the light has gone through the palette ONE time, its LifeSpan is finished and it disappears. Never leave LifeSpan at 0, or the light will die immidiatly (= useless!). For example if you enter 0.5, the light will finish the palette in 0.5 seconds.
After this, give it a Skin, as you did in the previous section: the palette of this skin determinates the colors the light will go through. Finally, set the LightType to LT_TexturePaletteOnce.
Now, the only thing that you have left to do is make the TPOnceLight get spawned when you want. First, select the SpawnThing you made in the Actor Class Browser, and add it in the level at the location where you want the TPOnceLight to get spawned. Then select the TPOnceLight in the Actor Class Browser, and open the properties of the SpawnThing in the level (NOT the default properties). In there expand SpawnThing, click on SpawnedActor and press the Use button. In the textfield, the name Class'MyLevel.TPOnceLight' should appear. Then in the properties of the SpawnThing --> Events --> Tag enter "TPOnceLightHere" (or any other Tag you want to give it).
Finally, you need a trigger or any other event to activate the SpawnThing. So add a trigger somewhere in your map, and in its properties --> Events --> Event enter "Once" (this is the tag you gave the SpawnThing). You can of course also use any other event instead of the trigger, for example an event caused by a mover or whatever.
If you now walk in that trigger, it activates the SpawnThing. This SpawnThing then spawns the TPOnceLight at its location. The TPOnceLight does his thing and then dies. Every time you activate the trigger again, a new TPOnceLight gets spawned, but of course all these new TPOnceLights will die after their LifeSpan so you don't have to fear an overload.
Go to the section Tubelights that Flicker On for something useful you can do with TexturePaletteOnce.
You don't need such a torch symbol to have lightsources in your map. Any object can be made to give light. For example chairs, trees, books, ... Open its properties and you'll see that all the objects have a Lighting and a LightColor expansion. Sometimes you'll have to change a lot of properties before the object gives light, for example because its lighttype is set to LT_None or it's LightColor or LightRadius are set to 0. There is however a minor problem with this: if you add for example a light to a shieltbelt, and someone takes the shieltbelt away, the light will still be there.
You can really set any object to give light, even brushes! However, if you set a brush to give light, this will only be visible in the editor, in UT the brushes are removed so also their lighting is deleted.
You can also add an AmbientSound to a light. The cool thing about it is that if you use a LightType such as LT_Strobe, LT_Pulse, LT_Flicker, ..., the sound will Strobe, Pulse, Flicker, ... as well. Very useful for a broken tubelight! First open the Sound Browser (in menu View, for UEd1 it's in the same window as where the Texture, Class and Musidbrowser are). Open the soundpackage Extro.uax and select Light6.
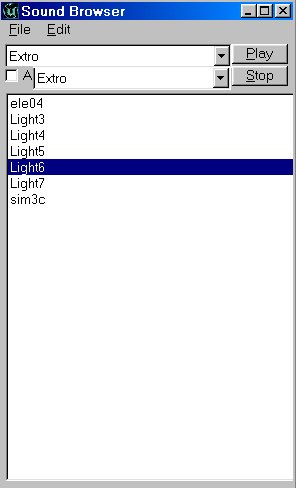
The Sound Browser
In the Light Properties expand Sound. Click on AmbientSound and press the Usebutton. In the 3D view set RealTimePreview on and listen to the sound. Now set the LightType to LT_Pulse, and you'll here the sound fade away and fade back in, together with the light. Now set LightType to LT_Flicker, and hear the sound flickering as well.
You can also change Pitch, Volume and Radius of the sound, by using SoundPitch, SoundRadius and SoundVolume.
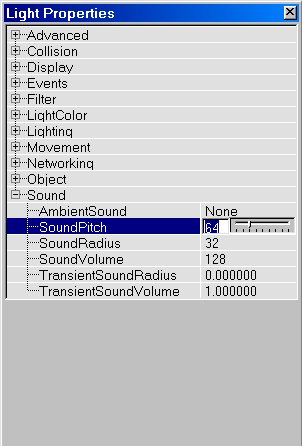
In the actor class browser, you can find more lights than just the standard one you used until now. Open the Actor Class Browser (it's in the View menu of UEd2) and expand Light.
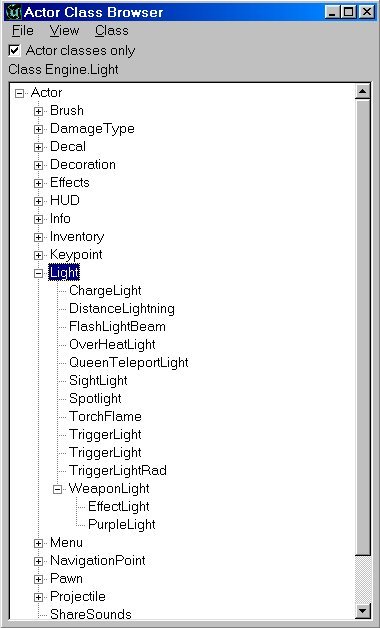
The Actor Class Browser with a list of all lightclasses
Most of these lights are just normal lights with some activated properties, like LightType or LightColor.
Only DistanceLightning, TorchFlame and TriggerLight are useful. The others are broken, or only work if they are spawned during gameplay.
See in the section above and select the TorchFlame. Place one in a room.
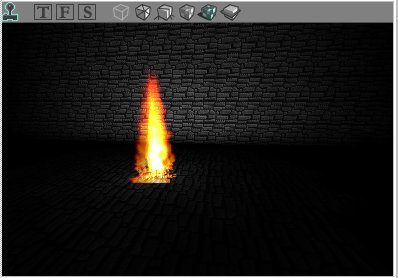
A TorchFlame
It's a nice flame that gives light as well. There are a lot of properties that you can change for this flame: open its TorchFlame Properties and expand Display.
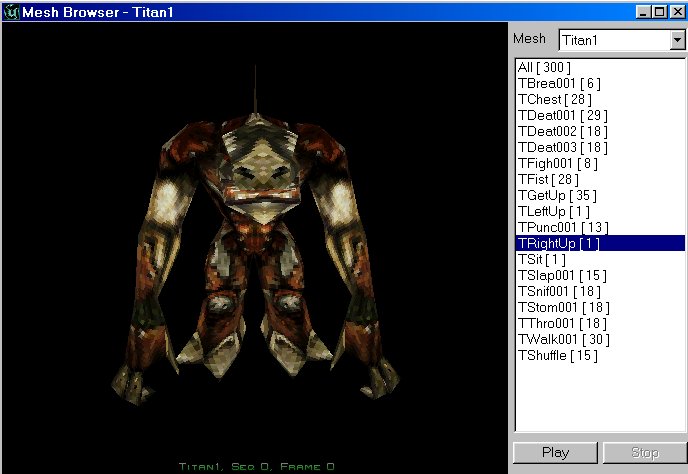
The Mesh Browser
To make your map realistic, it's best that you always make lightsources for the lights. I mean, if you place a light in a building, place for example tubelights in it. You can creating lightsources yourself by using brushes. But there are also lots of nice lightsources in the Actor Class Browser. Under Decoration: Candle, Candle2, Lamp1, Lamp4, Lantern, Lantern2, InterpolatingObject and under Decoration --> ut_Decoration (an expansion of Decoration): TubeLight and TubeLight2
In their properties, you can change their size etc..., look in the section LightBoxes of this tutorial for this.
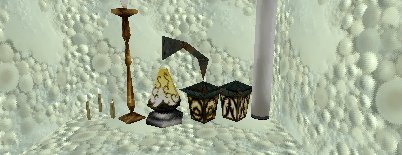
Some of the LightSource Decorations
You can give the lightsources a lightbox.
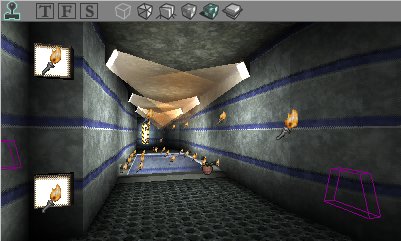
LightBoxes in CTF-Coret
The lightboxes are also an actor class. In the actor class browser, there is one under Decoration: LightCone, and there is one under Decoration --> ut_Decoration: LightBox
Open the LightBox Properties, and go to Display
For this section I assume that you know something about triggers, if you don't please read a tutorial about it.
To make a triggerlight that will toggle between on and off each time you touch the trigger, do the following: In the Actor Browser, expand Triggers and there select Trigger. Place it in your map on the place you want to be the switch of the light. Now, expand Lights in the actor class browser and there select TriggerLight. (There might be two TriggerLights in the list, but they are the same). Now place it in your map.
Open the Trigger Properties ot the trigger and expand Events and type a name in Event, For example NiceLittleLight. Now open the TriggerLight Properties and there exand Events as well, and under Tag type the name you typed in the Event of the trigger, in my example NiceLittleLight. In triggerlight properties expand Object and set InitialState to TriggerToggle.
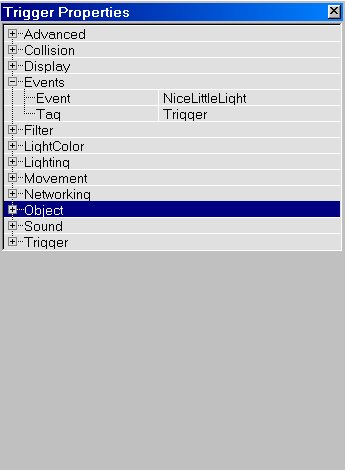
Trigger Properties
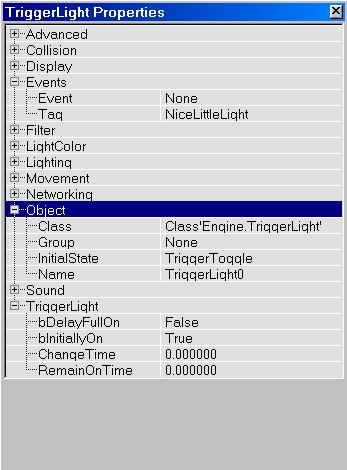
TriggerLight Properties
You now have a working TriggerLight. You can use these properties, in the TriggerLight Properties:
In Object you can change the InitialState of the light:
When a tubelight gets a little older, and you switch it on, it'll first flicker a few times before it's on. Using TexturePaletteOnce, you can make this effect in the game: first read the TexturePaletteOnce section if you didn't already. Now, make a new light class called "FlickeringTubeLight". Make a Skin for it: in PSP of PhotoShop or any other painting program that can edit palettes, make a palette like this:
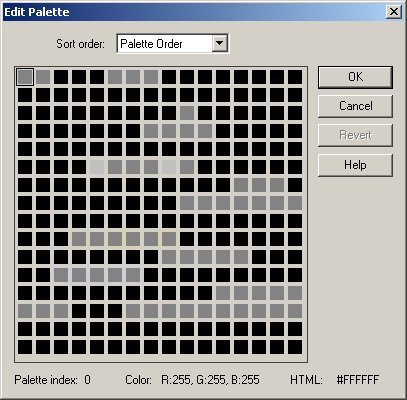
With this palette, the light will first flicker a few times, and then at the end of this palette, it dies and so there should be no more light, but you're going to make a TriggerLight to go on at this moment.
Save this as a *.pcx file and import the texture into UnrealEd, and give it to Skin in Display in the FlickeringTubeLight's Default Properties. Don't forget to set bStatic = bNoDelete = False. Set LifeSpan to the time you want the tubelight to flicker, for example 2, and remember this value.
Now, add the SpawnThing at the location of the tubelight, set its SpawnedActor to the FlickeringTubeLight, and its Tag to for example TubeLightFlicker. Then, also add a TriggerLight at the same location as the SpawnThing, set its Tag to TubeLightOn. Set the InitialState of the TriggerLight to TriggerTurnsOn. Now add a trigger with Event TubeLight, then add a Dispatcher with Tag TubeLight, and in Dispatcher --> OutDelays set [0] to 0 and [1] to the LifeSpan of the FlickeringTubeLight, in this example 2. Then in OutEvents set [0] to TubeLightFlicker, and [1] to TubeLightOn.
When you now activate the trigger, the Dispatcher makes the SpawnThing to spawn the TubeLightFlicker, that dies after 2 seconds, but exactly at that moment the Dispatcher activates the TriggerLight, so the tubelight is on and will never flicker anymore.
If you want to set the InitialState of the TriggerLight to TriggerToggle, then when you press the trigger again the TubeLight will go out only after 2 seconds, and before it goes out the TubeLightFlicker gets spawned another time. Possible solutions are: script something, or use a different trigger for turning the TubeLight on or off, the trigger to turn on with the same Dispatcher as described above, the other trigger with as Event TubeLightOn. You only have to make sure the player can NOT press the same trigger again without pressing the other trigger first.
The following few sections require you to know something about movers. There's a tutorial on movers at http://www.perilith.com/~lode/tutorials/movers/movers.html
Movers have several properties that have to do with lighting: expand Mover in the Mover Properties.
An example of the effect of WorldRaytraceKey is shown on these screenshots. The mover is a lift with two keyframes: Key0 is down, and Key1 is up. Of course this only works when bDynamicLightMover is False
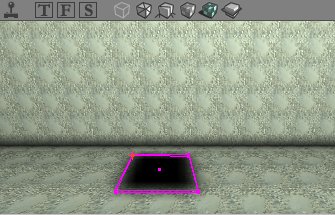
WorldRaytraceKey = 0
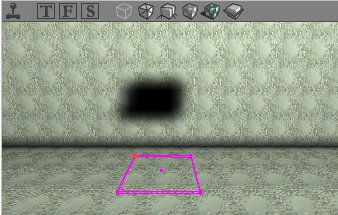
WorldRaytraceKey = 1
The second shadow is calculated as if the mover was at its up position. You can also use this to create fake shadows.
The Unreal engine supports moving lights: for example if you shoot a rocket, you see a shine of the light on the floor, ceiling and walls moving as well. Also the Flashlight and the Searchlight are moving lights, because you can walk around with them. However, there is no Moving Light class in UT that you can program to follow a certain path. The only way to make such a light, is to attach a normal light to a mover!
Most objects in UT don't give much difficulties to attach to a mover. To attach an object to a mover, you need to use an AttachMover instead of a regular mover. To get an AttachMover in UEd2, right click on the Add Mover button, and in the list that appears choose AttachMover. In the AttachMover's properties, open AttachMover and give an AttachTag. Now, open the properties of the object you want to add, and expand Events. In there, set the Tag to the AttachTag of the AttachMover.
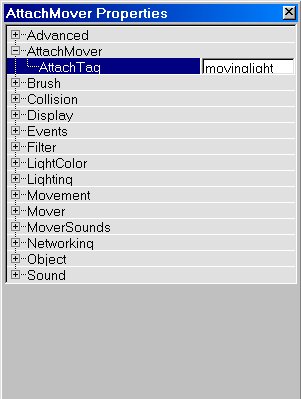 Give the attachmover an AttachTag... |
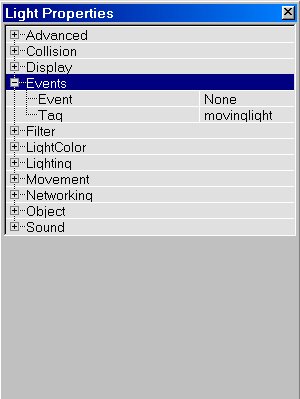 ...and give the moving object the same Tag |
You can also connect objects to movers that are not AttachMovers, for example normal movers, GradualMovers or LoopMovers. To do this, open the Movement tab of the object and give it an AttachTag, and set the Tag under Events of the Mover to the AttachTag of the object. This means using this technique, you give the object and AttachTag and the mover a normal Tag, while using the AttachMover technique, you give the mover an AttachTag and the object a normal Tag.
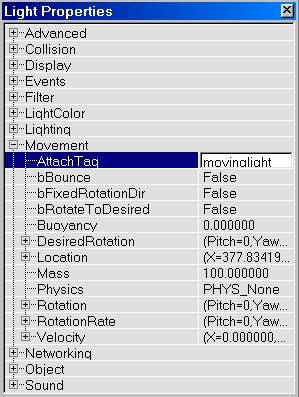 Give the object an AttachTag... |
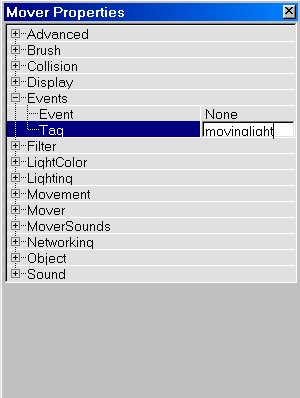 ...and give the mover the same Tag |
So this way works for most objects, but not for lights. Before the light will be able to move, you have to change some more settings: open the Light Properties and expand Advanced. In there change the following settings:
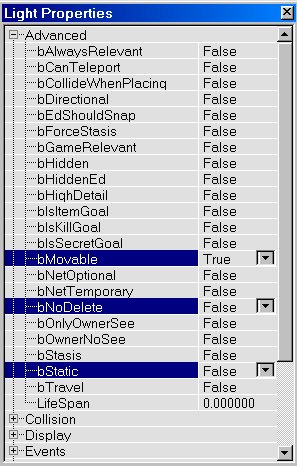
Change these three settings before the light can move
This is not only for lights, for each object you have to make sure bMovable is True and bStatic is False. Most objects have these settings like this already. These settings are self-explanatory: if bStatic is True, the object is a static object that will remain fixed on his position for ever. If bMovable is False, the object will not be able to move. So basicly these two settings do the same, the only difference is that the True of bMovable is equivalent to the False of bStatic, and vice versa.
The bNoDelete setting is a little more difficult.
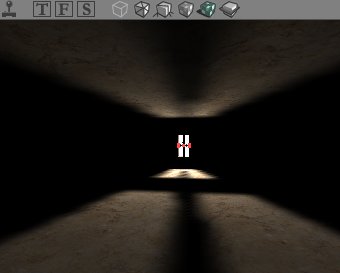 A light with bNodelete to True casts realistic shadows on High Shadow Detail walls. |
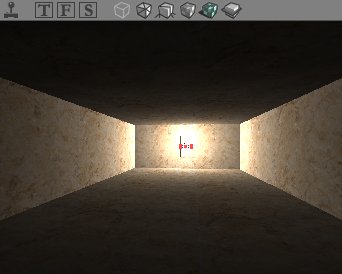 The same light and walls, but with bNoDelete to False: a much uglier lighting algorithm. |
If you have a moving light, but set bNoDelete to True, you get a really weird effect: the Unreal engine cannot calculate the moving shine of the light, so it uses a simple solution: only when the light is at its begin position you see the light, and when it moves, the shine of the light on the wall disappears. With bNoDelete to False, you will see the lightshine does not disappear, but moves together with the mover.
Another detail about bNoDelete is that if bNoDelete is True (its default value), the WorldRayTraceKey and BrusRayTraceKey of movers work proporly, but if it's False, these are just ignored. However that doesn't matter, as the light will move together with the mover anyway.
You can use moving lights for example to attach to vehicles, spaceships, trains or other moving things. But when you want a light to move on its own, without vehicle or train, you can't do this without creating a mover. Then just place the mover outside the map, the light will still move together with the mover, no matter how far it's away from it.
Also, if you want the light to move forever, and not only when you hit a mover, you have to use for example a LoopMover, look at http://www.perilith.com/~lode/tutorials/movers/movers.html#looping for more details about this.
LightEffects like LE_Disco and LE_Rotor, and LightTypes like LT_Pulse etc... work with moving lights, even when bNoDelete is False. Also Fog works when the light is a moving light, try it out because moving fog looks great! You can use this for example for realistic foggy clouds moving around.
However, Coronas give some problems! First of all, when you add a corona to a light with bNoDelete to False, and rebuild lighting, the corona will not appear. There is a way to get around this! To do this, first set bNoDelete of that light to True and rebuild your whole map. Because bNoDelete was True, the corona is there and everything is just fine. However after that, set bNoDelete to False and do not rebuild anymore, but just save your map. The corona will remain there and also work in the game. You will have to do this every time you want to play the map, and the most important moment to do it is just before you release your map. You don't have to do all this if you use seperate lights for the corona and the shine: the coronalight does not have to be bNoDelete = False, because you don't need its shine and set its LightBrightness to 0.(see also a little further)
This was only the first problem. The second problem is a lack of support from the Unreal engine. Coronas work like this: there is a certain radius, determinated by the LightRadius setting. Only if you are inside that radius, you see the corona. Now here is the problem: this Corona Radius does not move together with the light! This means, if you have a light that moves together with its corona, you can see the corona as long as you stand in the beginposition of the light, even if the light is 25 kilometers away. But when you move together with the light, you move away from the center of the CoronaRadius that stays on the beginposition, and you will not see the corona anymore, even if you stand on the same place as the light's current position.
What is the solution for this? Use a seperate light for the corona and the shine, and give the light with corona a LightBrightness of 0 but a huge radius. Set the radius of the other light to a normal radius, and give it no corona. (You can also read this at the end of the Corona section). The radius of the corona is most of the times big enough to work for very large distances. An advantage of this technique is that you don't have to set the bNoDelete of the coronalight to False, so you don't have to solve the first problem.
There's a working moving corona in the example map.
In the Tools menu, there's a tool called Scale Lights.

Select one light and open its Light Properties, expand LightColor (you don't have to do this, but do it now so you can see the value changing). Now open Scale Lights... in the menu Tools. Enter a Literal Value of 100. Make sure you can see the LightBrightness in the light properties. Press OK in the scale lights window and look at the LightBrightness changing. Every time you press Ok, it changes: it becomes 100 brighter exept if it will become more than 255: then it will be dark again.
If you enter a Percentage of 100, the LightBrightness is multiplied by 2 every time you press OK. If it's 50, it will be multiplied by 1.5, if it's 20, by 1.2, etc...
You can also enter negative values, to make the lights darker.
The advantage of this tool is that, if you select 2 or more lights, and use the tool, the lightbrightnesses are calculated independent for each light. So if one of the lights had a brightness of 50 and the other one of 80, and you entered a literal value of 20, the first light will become 70 and the second one 100.
This tool might be useful if you have a room with lights with different lightbrightness and you want to make them all a little bit brighter. Just select them all and use the tool.
Light doesn't go through solid or semisolid walls in the Unreal Engine (duh). But it also doesn't go through translucent or masked walls. It only goes through non-solids, but then you can walk through the wall or window or fence or whatever. If you want light to go through a solid or a semisolid wall, there is a complicated way to do that:
If you have for example windows with glass in them and want the light from outside (for example lightnings) to go through it, make the glass a mover, set its key0 to its normal place in the window and key1 on a place far away from it. Set WorldRayTraceKey to 1 and set its InitialState to TriggerToggle and enter a unique tag for the brush. Do not create a trigger for it. This way, the mover will never move. Now, rebuild lighting: the light will be calculated as if the window is on that other place far away, so the light WILL go through the window.
Light goes through non-solid walls, but the only problem is that you can walk through these walls. However, sometimes you have a situation in which it doesn't matter that you can walk through them. For example if you create lanterns. To do this, make a brush that looks like a lantern and place it at the right location, open the Brush menu, choose Add Special... In the window that appears, set Prefabs to Regular Brush and set Solidity to Non-Solid. Then press Ok.
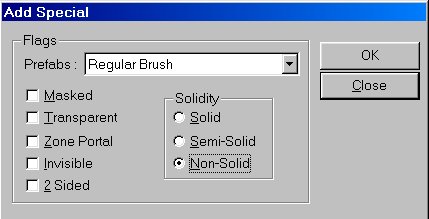
The Add Special Brush window
Now, add a light and place it inside the non-solid lantern. Rebuild geometry and lighting, and you'll see that the lantern gives light. If it was solid or semisolid, the lantern would not have given light.
A nice thing is that you can also see the corona of the light, if it has one.
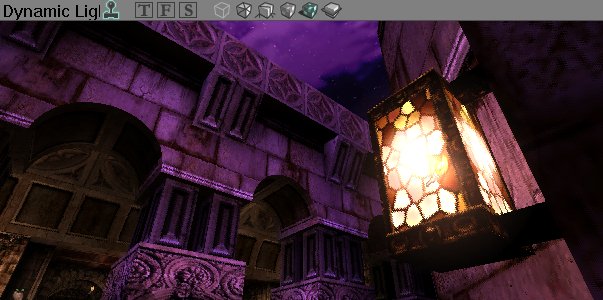
The map DM-Gothic uses non-solid lanterns.
In the Actor Class Browser --> Inventory --> Pickup, you'll find Flashlight
and Searchlight. These are the old ones from Unreal 1.
If you place them in an UT map, and a player picks them up, they work!
This can add a lot of value to maps, it's really cool in dark caves etc...
The SearchLight shines better and has longer battery power than the flashlight.
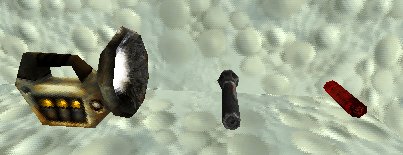
The SearchLight and the FlashLight.
If you have a translucent wall, you can make it more/less translucent by giving it much/little light. Use special lit if you don't want the enviromnent to be affected by this. A translucent surface that is not illuminated at all, will be invisible.
The same counts for Modulated textures, only they will become black if they are not illuminated at all.
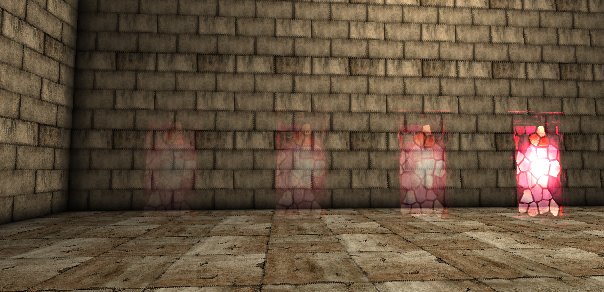
Every time the same texture, getting less translucent when it
receives more light.
If you place coronas in the skybox, you can not see them in the game. Th UT engine just doesn't support that. The best way to get a fake corona in the skybox, is to make the light a 2D sprite (go to section Sprites for this), and set Style in Display to STY_Translucent. In the map, you can't see that it is a fake, because you are not able to move closer or further away from it.
In the Actor Class Browser choose Light --> DistanceLightning. This is a light that flashes about every 30 seconds, like a real lightning. If you want lightnings in your map, use these.
Always place them in the skybox, so the clouds get the effect of the lightning, but you also have to place some in the map itself to enlight that as well. You can create cool effects with lightnings through windows, if you set floor and walls to High Shadow Detail.
For this section, I assume that you know something about scripting, if you don't know anything about it you can destroy your UT if using it wrong.
Lightnings never appear without thunder. There are a lot of ways to create thunder, in the first place by adding a Sound actor, however it will make the thundersound every second and that is too often.
Many people have found a way around this with scripts or trigger systems. I tried this as well: I made a new actor called ThunderLightning. It is a the lightning and the sound together in one actor. Actually I copied the DistanceLightning's script and just added a few lines in it.
To get a ThunderLightning yourself, do the following:
First open the actor class browser and select Light. Then in the menu Class choose New.... The New Class window appears. First of all make sure that the Parent is Light. Use a packagename that does not exist already, or you'll destroy that package of your UT. The best Package name to use is MyLevel, because this way you don't have to create a seperate *.u file together with your map. However, if you want to use the class in multiple maps without making this script every time again, choose another name. As Name use for example ThunderLightning.

The New Class window
Right click on the new class and choose Edit Script, you now see the Script Editor.
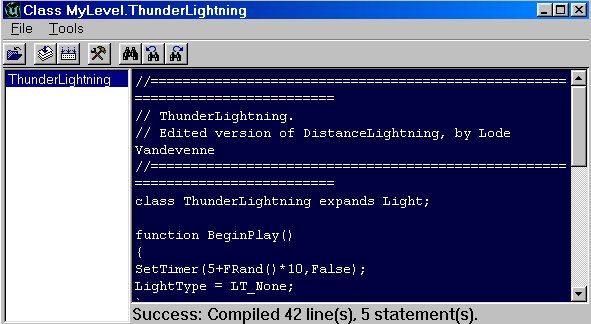
The Script Editor
Enter the following script:
//=============================================================================
// ThunderLightning.
// Edited version of DistanceLightning, by Lode Vandevenne
//=============================================================================
class ThunderLightning expands Light;
function BeginPlay()
{
SetTimer(5+FRand()*10,False);
LightType = LT_None;
}
function Timer()
{
if (LightType == LT_Flicker)
{
LightType = LT_None;
SetTimer(9+FRand()*20,False);
}
else
{
LightType = LT_Flicker;
PlaySound(Sound'AmbOutside.OneShot.thund1', ,255.0, ,6400.0);
SetTimer(0.8+FRand()*0.5,False);
}
}
After this, change the following default properties of your new class. Right click on the class and choose default properties.
Compile you script: in the Script Editor's menu Tools choose Compile Changed. Before you compile, make sure you have loaded the soundpackage (in this case AmbOutside) that contains the thundersound, or the compiler will give an error.
If you gave another package name than MyLevel, you have to save your package as a *.u file. In the menu view of the Actor Class Browser select Show Packages, and in there select your newly created package (not any other one, or you'll destroy UT) and in File of the Actor Class Browser choose Save Selected Packages.
If you distribute your map, don't forget to include the new *.u file you created in the system folder (of course not necaissary if you used MyLevel.)
You can also have it to make another sound, open the sound browser and in there open AmbOutside. There in OneShot are Lightn and Thunder sounds. To know what you have to enter in the script, create a light and set its AmbSound to this. You'll then see the name of it. Copy that name, and enter it in the pre-last line of the script, between the ' '.After that, remove the light again.
When this actor is ready, it's very simple to make a map with lots of lightnings and thunders by just placing ThunderLightnings everywhere in your map!
This is only one way to make lightnings and thunders. You can also do this by using a combination of stochastic triggers, distance lightnings, triggered lights and triggered sounds. There's a great tutorial on storms, lightnings and thunders by Darendash, at http://members.home.com/darendash/AdvancedLightning.html and there's another script for this at http://www.planetunreal.com/unrealed/tutorials/adv/storm/
Adding visible lightnings to the skybox gives really cool effects.
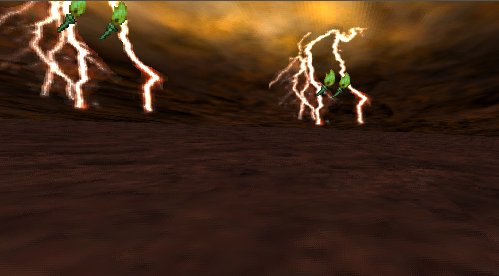
Lightnings in the skybox
To make them, you will need to import a masked lightning texture first.
Make a skybox in your map, and add some vertical sheet brushes in it, and give
them the lightningtexture. Now, you want the lightningtexture to be
visible only at the moment the lightning strikes. At all other moments,
they must be invisible. To do this, do the following:
Also make sure that there is no ZoneLighting in the SkyBox, and there are no other special lit lights.
This way, the lightningtextures will not be illuminated by any other lights than the DistanceLightnings, so as long as the DistanceLightning does not strike, the lightningtextures don't get illuminated and will be invisible.
There is one small problem with this: if you want the clouds of the sky be illuminated at all time, you cannot set it to Special Lit, but this way it will not get illuminated by the lightnings! The solution for this is to add a large horizontal sheet brush very close to the clouds, give it the same texture as the clouds, and set its surface properties to the same as the lightningtextures. This way, you have a new layer of clouds that looks exactly the same as the original clouds, and will be visible only when it gets illuminated by the DistanceLightnings.
One thing: these lightnings will look horrible if MultiTexture is disabled in the Direct3D settings (read more about these settings in the section Fog)
These screenshots show the difference between MultiTexture disabled and enabled. Make sure you enable it!
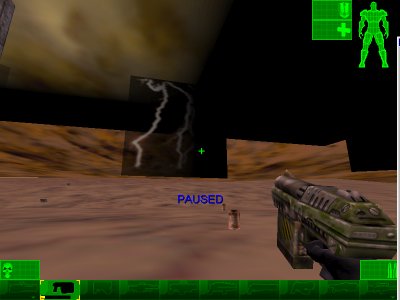
MultiTexture disabled
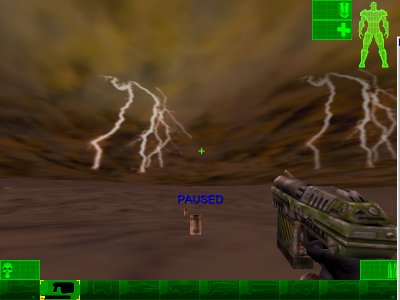
MultiTexture enabled
Sometimes it's very difficult to know when your whole map is too dark or too bright. The ligthing of your map can add a lot to the atmosphere, so some maps need to be brighter or darker according to their theme. However, making a map TOO dark can ruin a good map. You can never be sure if your map is too dark or not, because every player has his own monitor settings, gamma setting (press F11 in the game to make the gamma brigher or darker), etc..., so a map that looks bright/dark on your pc might look very dark/bright on someone else's pc.
What you can do is, first of all look at the official maps included by Epic. These have a correct global lighting. Just pick a map that has about the same atmosphere/theme as your map, remember the global lighting of that map and try to put that into your map by altering the ZoneLight a bit, or making all the lights brighter or darker.
Also let some other people betatest your map and ask them if they find it too dark or too bright.
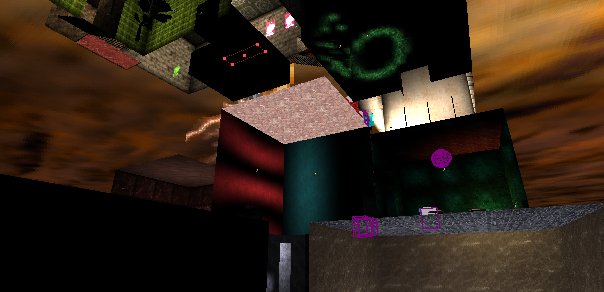
A screenshot of the example map. With multiple rooms
visible, and that's what makes the screenshot so ugly.
I've included a large example map in this tutorial, called
DM-LightingDemo.unr. It's included in the zipped version
of this tutorial. If you open it in UT, make sure there are no bots, they
are really annoying! Also make sure Volumetric Lighting and ScreenFlashes
are enabled.
Here's a description:
Once you are in the map, you are in a large outdoor environment, with a storm.
You will hear thundersounds, because I added some ThunderLightning classes in
there, and if you wait a little bit you will see lightnings in the sky. In
front of you is a large building, the entrance is indicated by two green lights.
If you enter the building, you are in a large dark room. A trigger will activate all TriggerLights on the ceiling, making it very bright.
The next room is a dark room, with a green strobing blacklight in it. That's why the Nali's and the trees are strobing like that.
After that, you enter a small corridor with a broken tubelight in it. If you listen you will hear the flickering sound of it.
At the end of the corridor is a foggy room, and after that there is a room with moving lights in it. Some of the moving lights have Volumatric Lighting, so it looks like a moving cloud. There's also a moving corona.
Walk on the stairs, and enter the next room. There is a window with light shining through it, casting a nice shadow on the floor and the walls. If you wait a few seconds, you will also see the lightnings through it.
Walk on some stairs again, and you enter a room with lava in it. The lava looks so bright because its surface properties in Unlit, and there's a light with a fireeffect.
The next room shows an example of the use of special lit: some of the walls are illuminated by a blue light, the others by a red light. After that you enter a discobar, with a discolight in it, that changes color because its LightType is TexturePaletteLoop and it has a colorful candy skin.
There is a door in this disco room, and if you go through it you enter a room that looks exactly the same as the castles of the old game Wolfenstein3D. It even has 2D objects in it, just like that old game had, and there's no lighting at all: everything is Unlit. There is a lift. To make the lift go up, stand close to its wall with switch. To make it descend, move away from the switch.
Once you are up, you enter a room with some rotating coronas in it, and there is a fire.
In the next room you see green rings on the wall, created by lights with LightEffect LE_Shell, but if you enter the room, your screen suddenly turns blue. That's because there is a Zone with ZoneFog in the room.
After that you see a room with lightboxes.
If you go up the stairs you enter a green room, and on the right you see a dark corridor. There's also a FlashLight on the floor. If you pick it up, you can use it to walk in the dark corridor.
Once you are out of the corridor again, use the stairs to go to the next room, with a lot of translucent windows in it. The first one are hardly visible, while the last one is almost completely opaque. This is because the first ones almost don't get any light, while the last ones have a really bright light next to them.
As a bonus, you now can use the stairs to go to the roof of the building, and then jump off the building.
This zipfile includes the html, all screenshots and the example map. It is 2616 KB.
Version 1.45 (August 13th 2001)
Version 1.4 (July 31st 2001)
Version 1.31b (July 26th, 2001)
Version 1.31 (February 2001)
Version 1.3 (February 2001)
Version 1.21 (January 14th, 2001)
Version 1.2 (January 7th, 2001)
Version 1.1 (December 2000)
Version 1.01 (September 2000)
Version 1.0 (September 9th, 2000)
Version 0.0 (August 11th, 2000)
Please contact me if you have any suggestions, questions, problems, or whatever: email is at https://lodev.org/contact.html
(c)2000-2001 Lode Vandevenne. Do not copy/translate any of the content of this tutorial to a site/book/whatever without my permission.